

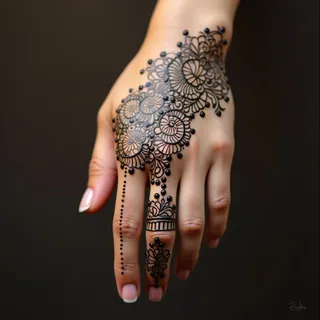
The Intricate Beauty of Mehndi Designs
As an apprentice learning various art forms, I find the precision and cultural significance deeply inspiring. It’s more than just decorating your hands; it's about storytelling, tradition, and artistry.
Getting Started: Your Tools & Materials
- Henna Powder: Not all henna is created equal! Look for 'body art quality' henna – this ensures a rich, dark stain. I once made the mistake of using regular henna…let’s just say the results were disappointing and patchy. Lesson learned!
- Essential Oil (Eucalyptus or Tea Tree): This helps the dye bind to your skin and creates a deeper color. Don’t skip this! It's like the secret ingredient.
- Lemon Juice/Sugar: To adjust consistency – lemon for thin lines, sugar for smoother application.
- Application Tools: Cones are easiest for beginners, but you can also use bottles or syringes. I started with cones; they’re much more forgiving when you're still learning to control the flow.
Basic Mehndi Patterns: Building Blocks of Beauty
- Dots: The foundation for many patterns. Consistency is key – aim for even size and spacing. I used to get frustrated with uneven dots, but practice really does make perfect.
- Circles: Combine dots to create circles, then layer them.
- Petals: Easy teardrop shapes that form beautiful floral motifs.
Tips & Tricks from a Beginner's Perspective
- Consistency is Everything: The paste should be like toothpaste – not too thick, not too runny. Too thin and it’ll spread; too thick and it will clog your cone.
- Practice on Paper First: Seriously! I wasted so much henna before I started practicing on paper. It's a lifesaver.
- Don’t Worry About Perfection: Mehndi is about celebrating, not perfection. Embrace the imperfections – they add character! Mehndi art takes patience and practice. Don’t get discouraged if your first attempts aren’t perfect. Every line teaches you something new.