
Back Hand Mehndi Designs: A Guide to Elegance & Tradition
Mehndi, or henna, is more than just decoration—it's a vibrant tradition in South Asia. This guide explores the unique beauty of back hand mehndi designs, offering inspiration and practical tips for creating stunning artwork.
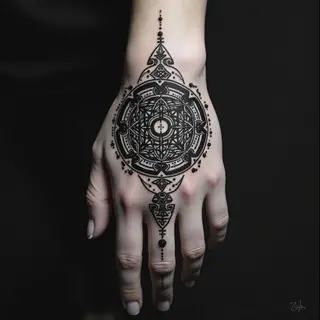
Understanding the Canvas: Back Hand Designs
The back of your hand presents a distinctive shape compared to the palm, opening up exciting possibilities for design. It’s a space where larger motifs and more elaborate patterns truly shine—things that might feel cramped on the palm.
Design Inspiration: From Classic to Contemporary
Let's explore some popular design themes. Think of it as a menu for your artistic expression!
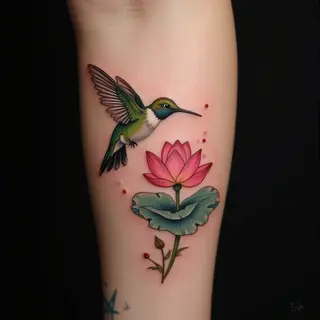
Floral Delights
Roses, lotuses, and jasmine are perennial favorites—each bloom carrying its own symbolism. Imagine arranging these in a symmetrical pattern for balance or an asymmetrical design to create visual interest.
Paisley Patterns
The paisley, or buta, adds instant sophistication. I’ve seen these used as standalone elements and beautifully integrated with floral designs—they really elevate the overall look.
Geometric Grace
Modern mehndi embraces geometric shapes. Triangles, diamonds, even simple squares can create a surprisingly contemporary feel when incorporated thoughtfully.
Arabic Influence
If you're aiming for a bold statement, Arabic-inspired mehndi is the way to go. Think dramatic lines, larger patterns, and intricate vines—it’s all about making an impact.
Minimalist Magic
Sometimes less is more. A minimalist design with delicate dots, lines, and a few small floral accents can be incredibly elegant—and surprisingly quick to apply.
Application Tips: Getting it Right
Here’s what I've learned over the years about getting a beautiful, long-lasting mehndi stain. It's not just about the design; proper application and aftercare are key.
- Preparation is Key: Gently exfoliate your skin beforehand—it helps the henna adhere better.
- Design Transfer: Freehanding takes practice, but stencils are a great option for accuracy when you're starting out.
- Henna Paste Consistency: The paste should have the consistency of toothpaste—not too thick and not too runny.
- Drying Time: Patience is a virtue! Let it dry completely (usually 15-20 minutes) before removing excess powder.
- Aftercare is Crucial: Keep your hands warm and avoid water for several hours—this helps develop that rich, deep stain you’re after.